Add live captioning to an event
For Live events with StreamText captions only. The Webcast service does not have a built-in live captioning feature. However, you can create a custom tab and include real-time captioning delivered through the StreamText platform in your Live event. To include live captioning, you must request captioning services, set up a custom tab with the StreamText embed code, and then invite the captioner as an attendee. On the day of the event, the captioner joins as an attendee and types the captions into StreamText, which are then displayed to the audience in the custom tab.
Notes:
- You can't add live captioning to the archived version (replay) of a Live event. To add captions to an event replay, see Add captions to a recorded event.
- Because live captioning is not a feature of this platform, Support is not able to set up, test, or manage captioning for self-service clients. If you would like someone to manage an end-to-end integration, contact your sales representative to arrange a consultation package.
Jump to: Request captioning services | Example code | Set up the live captions tab | Preview your work | StreamText URL formatting
Request captioning services
We can book live captioning for your event.
To request live captioning:
- If you have a Standard or Premiere plan, send us an email at GlobalReservations@webcasts.com.
- If you have an Essential, Professional, or Enterprise webcast plan, go to the Professional Services Request site.
You can also use your own third-party captioning provider, as long as they use the StreamText platform.
When you request live captioning through us, we provide your event ID to the captioning provider, who uses it to identify your event in their StreamText account. When you set up the custom tab, include this event ID in the embed code. If you schedule your own captioner, we recommend that you give them your event ID to use as their StreamText event name (identifier); confirm the value they used and include it in the embed code. To learn more about the process for scheduling captioning services, contact Support.
Example code
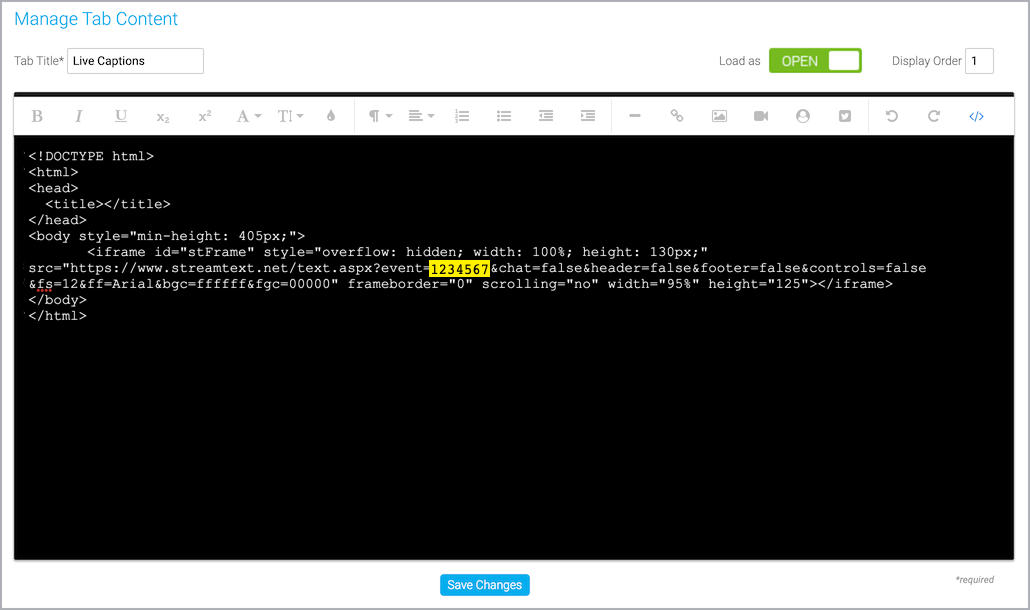
Use the following example code to embed captions in the custom tab. In the code, find event=1234567 in the code and replace 1234567 with the event ID for your event. If you're using your own captioning services, replace 1234567 with the event name provided by the captioner.
Important: If you requested captions in a language other than English, you must include an additional language parameter to the link for them to display correctly. For example, if you requested captions in Spanish, you must add &language=es to the link after the event ID or name. For more information, see StreamText URL formatting.
    <!DOCTYPE html>
    <html>
    <head>
      <title></title>
    </head>
    <body style="min-height: 405px;">
    <iframe id="stFrame" style="overflow: hidden; width: 100%; height: 130px;" src="https://www.streamtext.net/text.aspx?event=1234567&chat=false&header=false&footer=false&controls=false&fs=12&ff=Arial&bgc=ffffff&fgc=00000" frameborder="0" scrolling="no" width="95%" height="125"></iframe>
    </body>
    </html>
Set up the live captions tab
Sign in to the Webcast Admin portal and edit the Live event.
To add the live captions tab to an event:
- On the left panel, click the Event Content tab.
- Under Optional Content, expand the Add Custom Player Tabs section and click Add Sidebar Tab.
- Enter a name for the captioning tab and set Load As to Open.
- Optional. The Q&A tab displays under the video player in your event by default. To have the captions display under the video player, enter 1 for the Display Order.
- At the right side of the editor, click </> to switch to code view.
- Delete all the placeholder code.
- Copy the example code and paste it into the editor.
- In the code, find event=1234567 and replace 1234567 with the seven-digit event ID for your event or the event name.
If your captions are in a language other than English, be sure to include the language parameter in the link.
- Click Save Changes to save the coding. Then click Save and Continue to save changes to the event content.
Preview your work
Always preview the tab setup before the Live event.
To test captioning for your event:
- In the Webcast Admin portal, edit the event.
- On the Event Content tab, edit the sidebar tab you created for captioning and replace your event ID or name with ihaveadream.
...src="https://www.streamtext.net/text.aspx?event= ihaveadream &chat=false...
- Click Save Changes to save the coding. Then click Save and Continue to save changes to the event content.
- Now preview the web player: click the Event Summary tab and at the top of the page, click View My Event .
Make any changes to the display. When ready, go back and place your event ID in the sidebar tab coding.
StreamText URL formatting
The captions can be visually controlled by passing various query strings (parameters) in the URL. Here are the options used in our example code; we hide various elements to ensure captions display well in a sidebar tab. For a complete list of options, see this StreamText help article.
| Query String | Purpose | Used in our example code | Result |
|---|---|---|---|
| language |
Required for displaying captions other than English. The ISO 639-1 code for the caption language. Examples: |
N/A | English captions |
| chat | Displays the chat box | &chat=false | Chat box hidden |
| header | Displays the title and the controls | &header=false | Header hidden |
| footer | Displays gray footer with copyright | &footer=false | Footer hidden |
| controls | Displays a toolbar that allows each attendee to change the font, sizing, and other formatting of the captions they're viewing | &controls=false | Controls hidden |
| fs | Font size | &fs=12 | 12 pt font |
| ff | Font family | &ff=Arial | Arial font |
| bgc | Background color | &bgc=FFFFFF | White background |
| fgc | Foreground color; sets the text color | &fgc=00000 | Black text |

